Using
the Events Editor
Events
The Mapper tool is used to
create the background scenery for a game level. The Events Editor is
used to add the events, moving objects such as enemies, platforms, tings,
and animations.
Running the
Events Editor
| The Events Editor is not a
separate program like the Mapper. The Events Editor is invoked while
playing the Rayman game from Rayman Designer. Once your map is
totally or partially created and you have saved it in the Mapper, run
the Rayman game from Rayman Designer. After the introductory
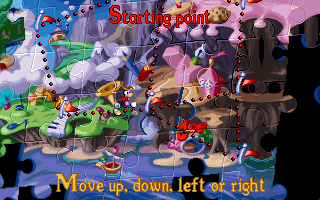
screens, you come to the screen where you can move Rayman to one of
the six worlds (Jungle, Music, Mountain, Image, Cave, Cake). Move
Rayman to the world in which you are building your level, and press the
SPACE BAR.
|
|
 |
| The first screen to appear in
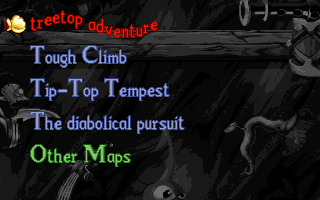
each world is a list of the levels for the world you selected. To play your level, use the DOWN
ARROW key to move the golden glove to "Other Maps". Then press the LEFT
or RIGHT ARROW
keys to scroll through the available maps. When you see your map, press
the SPACE BAR to begin playing the level. |
|
 |
Once you have started to play
your level, you can enter the Events Editor at any time by pressing the
'E' key. To leave the Events Editor and return to playing the level,
press the 'A' key. Warning - before you leave the Events Editor and
return to playing the level, SAVE YOUR CHANGES by pressing the 'S' key.
If you lose all of your lives while playing the level, you are returned
to the start screen without the opportunity to save your changes!
You can only run the Events
Editor from within games that you create; you cannot run it while
playing games which were created by Ubi Soft or games which you download
from the web.
Keys used in the
Events Editor
| |
E - |
Enter the Events Editor |
|
A - |
Quit the Events Editor and
return to playing the game |
|
S - |
Save changes made in Events
Editor |
|
K - |
Delete an Event |
|
. - |
Delete all Events (does not
work in all versions of the program) |
|
I - |
Display/don't display
links |
|
M - |
Enter/leave MAP mode |
|
T - |
Enter/leave TYPE mode |
|
N - |
Display a description of an
Event |
|
B - |
Block Events |
Additional Keys Available
While Playing a User Map
| |
W - |
Exit |
|
C - |
Move Rayman on the map
(while freezing him) |
|
V - |
Bring Rayman back to life |
|
D - |
Display/don't display
detection and collision zones |
|
R - |
Display/don't display
rasters |
|
L - |
Display/don't display map
number |
Placing Events in
the Events Editor
When you are in the Events
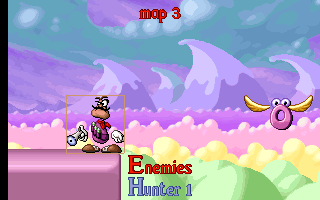
Editor, a cursor in the form of a hand  is displayed. To create a new event in the level, move the hand to
the general location where you want the event to be (you don't
have to be exact, you can move the new event later), and depress
and hold the right mouse button.
| The LEFT and
RIGHT ARROW keys allow you to select the category of events
(General, Tings, Road Signs, Gendoors and Killdoors, Enemies,
Rings, Scenery, or Platforms). The UP and DOWN ARROW keys allow you to
chose the specific event from the category. When you find the
event you want, release the right mouse button. In the example to
the right, a "Hunter 1" event was chosen from the Enemies category. |
|
|
To move an event which you have
created, place the cursor hand over the event, click with the left mouse
button and hold as you move the event around the screen.
To delete an event, place the
cursor hand over the event, making sure you see the brown selection box
around it, then press the 'K' key.
Remember to save your changes by
pressing the 'S' key.
Event Descriptions
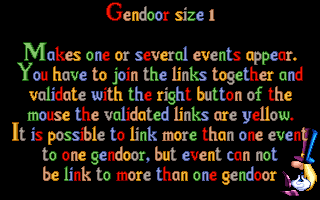
| To get more information about an event, place the
cursor hand over the event, making sure you see the brown selection box
around it, then press the 'N' key. We have to warn you, the descriptions
are not very helpful. The best way to learn how the events work is to
play the new levels and see what happens. |
|
|
Placing Types with the Events Editor
Some of the moving events
(clouds, rings, flying Antitoons) move in an area that has to be delimited by Reactive Types. (For more information, see the section
on Using Reactive Types.) Since it can
be difficult in the Mapper to anticipate the right placement for the
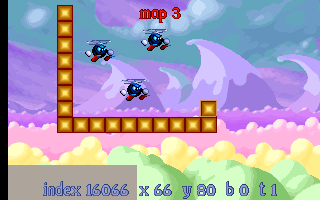
Reactive Types, you can also place Types in the Events Editor.
| Press the 'T' key to shift
to Type mode and then press the 'M' key. Place your cursor at the
location where you want to put a Reactive Type, click and hold the
right mouse button. With the keyboard's ARROW keys, select the
desired Type. Release the right mouse button. To delete a Type,
place the cursor on it and press 'K'. Press 'M' then 'T' to return
to the normal Events Editor mode. |
|
|
|
